Are your carpets clean? REALLY clean?
Are you getting the best results from vacuuming? I thought I was until recently when I was reading a very informative article about vacuums and how to use them.
Now grant it, I am in my 50's and thought I was very knowledgeable about how to use my vacuum but I must say I did learn some useful tips.
For one thing....we don't vacuum enough to get all the dirt from our carpet. We are in a hurry to get the surface clean but we forget that it's the dirt we can't see that is causing our carpets to wear out faster.
I recently spent the afternoon vacuuming my carpet very slowly and could not believe the dirt that was I picked up with my vacuum. After dumping the dirt cup out, I proceeded to vacuum again and again until very little dirt was in the collection cup.
So, the next time you pull your vacuum out think about how long you should vacuum in order to get your carpet clean.
September 18, 2012
Home How-to Tips - Quick Fix for Curtains
On no, you got too close with the vacuum cleaner to your Living room curtains and pulled the hem. You have company coming in less than an hour and no time to take them down to fix the hem. Well now, if you are like most families you have a home office.
All you need is a simple paper stapler and a little ingenuity. Use the stapler to temporarily fix the hem on your curtains until you have the time to either fix them yourself or for some curtains a dry cleaner will fix the hem and clean them too.
All you need is a simple paper stapler and a little ingenuity. Use the stapler to temporarily fix the hem on your curtains until you have the time to either fix them yourself or for some curtains a dry cleaner will fix the hem and clean them too.
May 27, 2011
Home How-to Tips-Outdoor Rooms
Big or small, inexpensive or extravagant, your outdoor living space is an investment toward creating your own personal sanctuary. But it doesn't have to be overly complicated: just include fire, water and earth, says landscape designer Michael Glassman. Here, he describes several ways in which you can use these elements to create a cozy open-air refuge.
Fire
“In a recent national survey, the No. 1 one request for an outdoor room is the outdoor kitchen," says Glassman. "The idea of dining under the stars is wonderful. Have you ever noticed how food just tastes better when you eat outside?"
Although outdoor kitchens can involve pricey, extensive projects, the idea is to extend your home's living space into the backyard. So if a built-in gas grill with all the accoutrements isn't in the budget, a charcoal grill will cook your meals up nicely. Whether you're serving a few or a family feast, you can find a variety of stylish outdoor dining tables and chairs to suit your needs.
On a cool, crisp evening, cozy up to a heat source — like an outdoor heater, chiminea or fire bowl — with a cup of tea and a good book. Or enjoy the ambiance and smell of a wood-burning fire in a custom-built or pre-fabricated fireplace.
Water
The sound of a gurgling fountain is a soothing addition to your backyard oasis. Keep it simple with a tabletop fountain or get more elaborate with a professionally installed bubbling stream at the patio's edge.
Overhead structures like a gazebo or screened porch provide comfort and protection from rain, giving you more opportunities to spend time outdoors.
A palapa, or thatched roof structure, also provides protection when it's rainy, hot, bright and sunny. Call your local building or planning department to find out if you need a permit for a structure like this (in most communities you don't need one). Electrical outlets for a fan, heater or other device usually require some type of authorization.
Earth
Earthen elements, such as plants, rock, and other natural materials, provide year-round interest. Some elements, like stone paving and rock walls, anchor the space, while others, such as trees, shrubs and flowers, are fleeting and change throughout the seasons.
Incorporate earth tones into your accessories to connect them with nearby plantings, mulched beds and stonework. For example, outdoor carpets provide the indoor look outside. They're made from a weather-resistant fabric that's durable and won't mildew. They're easy to clean, and they dry quickly.
Outdoor furniture can also enhance the earth element by incorporating pieces made with different grains and colors of wood. When selecting furniture for your outdoor room, aim for comfort. Then consider the size; don't over- or under-scale your furniture for the size of the space. Finally, consider durability. Select items of good quality that won't easily fall apart in the elements.
May 15, 2011
Home How-to Tips "Spring" with some Speed Cleaning
Spring is just around the corner (for some, it's already here) and it's time to jump into some fast cleaning habits. One that I found caught my eye when I was browsing around the World Wide Web and one that you can do everyday. It's something from RealSimple.com, one of the few website that I frequent for information and some helpful hints.
Every Day Kitchen Duties:
• Wipe down the sink after doing the dishes or loading the dishwasher (30 seconds).
• Wipe down the stove top (one minute).
• Wipe down the counters (one minute).
• Sweep, Swiffer, or vacuum the floor (two minutes).
Every Day Kitchen Duties:
• Wipe down the sink after doing the dishes or loading the dishwasher (30 seconds).
• Wipe down the stove top (one minute).
• Wipe down the counters (one minute).
• Sweep, Swiffer, or vacuum the floor (two minutes).
December 10, 2010
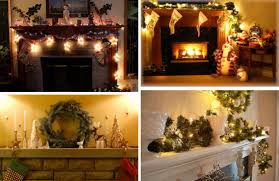
Home How-to Tips-Holiday Decorating
When you think of decorating for the holiday's, don't get stuck in the same old holiday colors and themes. You can decorate for the Christmas holiday's in colors other than green and red even though they are the traditional colors. Blue and gold or red and gold, it really doesn't matter as long as you like the colors and they compliment the rest of your home. Also, decorating with live plants will bring a lot of bling to your living room and the rest of your home. Here are some tips when planning your decorating adventure.
1. Don't go crazy with holiday cards, placing them all over your house. Display the in one area with a wire card display hanger.
2. Make sure you have a theme when decorating your home, whether it be whimsical or something as simple at fruit in a bowl. The small accents make the biggest impact.
3. Now let's not forget about the front door. A beautiful wreath or even just a big bow will make a big impact as guests enter your home.
4. Don't go overboard with decorating the outside of your home. String some lights along the top rail of your porch or along the columns.
5. And the magic of threes. It doesn't matter what it is, candles, bowls or pillows. Odd numbers bring focus and balance to the room.
November 7, 2010
Home How-to Tips-Bathroom Cleaning Problems Solved
1. "My shower curtain is crawling with mildew"
Wash it with a bleach solution. Shower curtains can be tricky to clean because they are big and cumbersome. Getting rid of mildew, especially during damp weather, can be especially challenging. Here’s a solution that’s quick, easy, and low-cost: Pour 1 gallon (3.7 liters) of warm water and 1⁄2 cup of household bleachinto a plastic bucket. With plastic gloves on, soak a sponge in this cleaning solution, give it a squeeze to avoid drips, and wipe. The mildew will vanish. Rinse using the showerhead.
 2. "I’m ready to toss this filthy shower curtain liner"
Toss it in the washer. Don’t throw away your liner just because of mildew and dirt buildup. Extend its life by cleaning it in your washing machine. Set the machine on the gentle cycle with warmwater and 1 cup of regular laundry detergent or 1⁄2 cup of vinegar. Afterward, whirl it in your drier, set on Low Heat or Fluff, for about 20 minutes. Your liner will come out clean and wrinkle-free. Rehang it immediately.
3. "My brass fixtures look dull"
Polish them with baking soda and lemon juice. Don’t rush out to buy an expensive brass cleaner. Save time and money by making a paste with equal amounts of baking soda and lemon juice. Dip an old toothbrush in the mix and lightly scrub the fixtures. Let the solution dry a few minutes and then buff the fixtures with a clean cloth. They’ll look brand new.
4. "The nooks and crannies in my bathroom are hard to clean"
Use an old toothbrush. An old toothbrush is the perfect time-saving bathroom-cleaning tool. For example, you can use it to clean the tracks of your bathtub’s sliding glass doors. Simply spray bathroom cleaner on a paper towel and wrap the towel around the bristle end of the toothbrush. Then scoot the brush along the tracks to dislodge dirt. Or put the little bristles to work on the grime that collects around the rim of a bathroom sink. Once the bristles have loosened the dirt, just mop it up with a damp sponge.
5. "I hate those mineral deposits on my bathroom faucet"
Remove them with white vinegar. No one likes crusty white deposits on a faucet. Try this easy solution: Before you go to bed one night, head to your kitchen for a bottle of white vinegar and three paper towels. Saturate the towels in the white vinegar and wrap them around the faucet like a cocoon. In the morning, remove thetowels. Fill the basin with warm water, plus a squirt of dishwashing liquid. Dip an old toothbrush in the solution and scrub the faucet toremove the final bits of mineral deposit.
6. "I have scum buildup on shower doors."
Use furniture oil to prevent buildup. Cleaning soap scum off a shower door is a tough, time-consuming job. Try using lemon oil furniture polish as a barrier against the scummy buildup. The next time you clean the door, follow up by wiping it with furniture oil on a soft rag. Let the oil sit for two minutes and then polish off the excess with a dry cloth. The furniture polish will leave a slight film of oil that will act as a buffer against future soap scum. Using a shower squeegee (available at discount stores and supermarkets) after every shower will also discourage the buildup.
7. "My glass shower doors are filmy"
Clean them with vinegar, baking soda, and salt. Stubborn mineral buildup on glass shower doors is no competition for a few common household ingredients—white vinegar, baking soda, and salt. Spray vinegar on the door and let it sit for a few minutes. Next, create a paste with equal amounts of baking soda and salt. Use adamp sponge to rub this paste over the door; then rinse well.
8. "My bathroom grout is grungy with mildew"
Spray it with vinegar. Mildew on grout is no match for that miracle household cleaning dynamo called vinegar. Just pour somewhite vinegar into a container, dip in an old toothbrush, and scrub away at the mildew. Or pour the vinegar into a spray bottle, squirt it on the mildew, and let it sit for ten minutes. Rinse with water and apply the old toothbrush if necessary. Bleach is effective in removing mildew from tile grout. Fill a spray bottle with equal parts of household chloride bleach and water. Spray the grout, let it sit a few minutes, and then wipe with a clean white cotton cloth.
9. "Those nonslip bathtub stickers won’t peel off"Loosen them with laundry presoak. You know the ones: They’re shaped like flowers and fish and are stuck on with industrial-strength adhesive. Instead of ruining the smooth surface of your tub trying to scrape them off, follow these simple steps for removing them: Carefully lift corners on each sticker using your fingernail or a plastic scraper. (Metal will scratch most tubs.) Spray the stickers with a good dose of laundry pretreatment product, such as Shout or Spray ’n Wash. Let the stickers soak in the spray for a few hours. This should loosen the stickers and allow you to
Wash it with a bleach solution. Shower curtains can be tricky to clean because they are big and cumbersome. Getting rid of mildew, especially during damp weather, can be especially challenging. Here’s a solution that’s quick, easy, and low-cost: Pour 1 gallon (3.7 liters) of warm water and 1⁄2 cup of household bleachinto a plastic bucket. With plastic gloves on, soak a sponge in this cleaning solution, give it a squeeze to avoid drips, and wipe. The mildew will vanish. Rinse using the showerhead.
Toss it in the washer. Don’t throw away your liner just because of mildew and dirt buildup. Extend its life by cleaning it in your washing machine. Set the machine on the gentle cycle with warmwater and 1 cup of regular laundry detergent or 1⁄2 cup of vinegar. Afterward, whirl it in your drier, set on Low Heat or Fluff, for about 20 minutes. Your liner will come out clean and wrinkle-free. Rehang it immediately.
3. "My brass fixtures look dull"
Polish them with baking soda and lemon juice. Don’t rush out to buy an expensive brass cleaner. Save time and money by making a paste with equal amounts of baking soda and lemon juice. Dip an old toothbrush in the mix and lightly scrub the fixtures. Let the solution dry a few minutes and then buff the fixtures with a clean cloth. They’ll look brand new.
4. "The nooks and crannies in my bathroom are hard to clean"
Use an old toothbrush. An old toothbrush is the perfect time-saving bathroom-cleaning tool. For example, you can use it to clean the tracks of your bathtub’s sliding glass doors. Simply spray bathroom cleaner on a paper towel and wrap the towel around the bristle end of the toothbrush. Then scoot the brush along the tracks to dislodge dirt. Or put the little bristles to work on the grime that collects around the rim of a bathroom sink. Once the bristles have loosened the dirt, just mop it up with a damp sponge.
5. "I hate those mineral deposits on my bathroom faucet"
Remove them with white vinegar. No one likes crusty white deposits on a faucet. Try this easy solution: Before you go to bed one night, head to your kitchen for a bottle of white vinegar and three paper towels. Saturate the towels in the white vinegar and wrap them around the faucet like a cocoon. In the morning, remove thetowels. Fill the basin with warm water, plus a squirt of dishwashing liquid. Dip an old toothbrush in the solution and scrub the faucet toremove the final bits of mineral deposit.
6. "I have scum buildup on shower doors."
Use furniture oil to prevent buildup. Cleaning soap scum off a shower door is a tough, time-consuming job. Try using lemon oil furniture polish as a barrier against the scummy buildup. The next time you clean the door, follow up by wiping it with furniture oil on a soft rag. Let the oil sit for two minutes and then polish off the excess with a dry cloth. The furniture polish will leave a slight film of oil that will act as a buffer against future soap scum. Using a shower squeegee (available at discount stores and supermarkets) after every shower will also discourage the buildup.
7. "My glass shower doors are filmy"
Clean them with vinegar, baking soda, and salt. Stubborn mineral buildup on glass shower doors is no competition for a few common household ingredients—white vinegar, baking soda, and salt. Spray vinegar on the door and let it sit for a few minutes. Next, create a paste with equal amounts of baking soda and salt. Use adamp sponge to rub this paste over the door; then rinse well.
8. "My bathroom grout is grungy with mildew"
Spray it with vinegar. Mildew on grout is no match for that miracle household cleaning dynamo called vinegar. Just pour somewhite vinegar into a container, dip in an old toothbrush, and scrub away at the mildew. Or pour the vinegar into a spray bottle, squirt it on the mildew, and let it sit for ten minutes. Rinse with water and apply the old toothbrush if necessary. Bleach is effective in removing mildew from tile grout. Fill a spray bottle with equal parts of household chloride bleach and water. Spray the grout, let it sit a few minutes, and then wipe with a clean white cotton cloth.
9. "Those nonslip bathtub stickers won’t peel off"Loosen them with laundry presoak. You know the ones: They’re shaped like flowers and fish and are stuck on with industrial-strength adhesive. Instead of ruining the smooth surface of your tub trying to scrape them off, follow these simple steps for removing them: Carefully lift corners on each sticker using your fingernail or a plastic scraper. (Metal will scratch most tubs.) Spray the stickers with a good dose of laundry pretreatment product, such as Shout or Spray ’n Wash. Let the stickers soak in the spray for a few hours. This should loosen the stickers and allow you to
September 25, 2010
Home How-to Tips-Fall Gardens
If you love the taste of Collard greens, Mustard greens or Turnip greens then a fall garden is for you. September or October is the best months to plant these types of vegetables. Our climate in North Florida is mild enough though the fall to grow a really good crop. Actually, when the first frost hits your patch of Collard greens, then you will have a great crop. The first frost that hits some how make Collard greens better, not sure why it happens.
You can either plant your greens in a row or scatter them is a large plot. I have used both methods this years to see which method would be easier for me to harvest. So far, my Mustard greens have been the most bountiful, producing a vast amount of leaves.
Stay tuned for my next post when I will give you recipes on how to cook this fall treasure.
September 14, 2010
Home How-to Tips-Hummingbird Nectur
If you have Hummingbirds that come back every year, and maybe thinking about making your own nectar for these tiny little birds? It is very easy to make and your flock of Hummingbirds will love it.

Hummingbird Nectar
4 cups of water
1 cup of sugar
Heat in a pot until sugar has dissolved completely. Let cool before pouring in the feeders. If you have a bunch of feeders to fill, you can double or triple this recipe and if you are in a hurry, add 2 cups of water to one cup in a pot, heat to dissolve sugar then add 2 cups of cold water to the mixture.
November 2, 2009
October 31, 2009
September 26, 2009
How to Use Whitening Gel for the Teeth
Brush and floss teeth as normally would. Try on the whitening trays before using the first time without any whitening gel to check for for fit. The bleaching trays should beclean and dry before applying the whitening gel.
Place very tiny drops of tooth whitening gel half way to the center front part leaving the edges free of gel.
Place the whitening tray in the mouth over the teeth, making sure the tray is firmly against the teeth. Wipe any excess gel that oozes over the edge of the tray and onto your gums with a tissue.
You can wear the trays for 30 minutes to 1 hour the first time and increase the wearing time if there is no sensetivity. Remove the tray,then rinse your teeth. Brush any remaining gel away. Clean and dry whitening trays after each use.
July 8, 2009
Home How-to Tips-How to Repaint a Interior Door

Whether you are painting a new interior door or repainting an existing interior door, the process is the same.
Things You’ll Need:
* sand paper
* primer (if new door or changing colors of an existing door)
* Semi gloss interior latex paint
* good paint brush
Step1
New interior doors need to be sanded first before any paint product is applied. As with any paint job the most important step is your prep work for achieve the desired results and it is very easy to achieve a professional look with the better quality paint brush, which will cost about $12 to $14 dollars.
Step2
Now that you have sanded the door to be painted, use a primer paint. This is necessary if you are changing the color of the door and for new interior doors. Primer can be applied with a cheaper paint brush. Let the primer coat dry, the using your sand paper, smooth the surface, running your hand along the door as you go, feeling for any imperfections.
Step3
Now you are ready for the top coats, using your better quality paint brush, this is where you will be glad for spending the extra money on the better brush. Starting at the top of the door and working your way to the bottom of the door is the best way to paint, you will eliminate any drips and runs on the door. If you do get runs, brush them out as soon as possible.
Home How-to Tips-How to Choose A Wall Mural
Wall murals are probably the oldest form of art recorded in human history. Cave drawings where the first art work that was displayed in a living space. Cave men used them to tell stories or their adventures and maybe how someone in their family group died. Wall murals have progressed through time as Egypt used the to honor their king or also tell stories. Wall murals have been used to mark periods of time through out the centuries. Today we use them much like the cave men did millions of years ago.
* creative imagination
Step1
Choose the wall where you want your mural to live. Take into to consideration your present decor and room theme.
Step2
Now that you have choose the wall and the room,it's time to choose the type of mural you want on the wall. Wallpaper mural or painted mural. True to life mural are much like wall paper, they have to be hung the same way. A painted theme take about the same amount of time but is much more personal.
Step3
Your next choice is to decide if you want to do this your self or hire a professional. If you love to draw to have a knack for wall paper, go for it. Other wise call in a pro.
Home How-to Tips-How to Paint Over Vinyl Siding
We all know that the reason we put vinyl siding on our homes is so that we never have to paint the exterior again. What happen when you decide you don't like the color of the vinyl anymore?
Things You’ll Need:
* pressure washer
* ladder
* paint
Step1
Pressure wash the exterior to remove any debris and any mold and mildew the has built up. This should be done at least once a year if your home has trees close to it. Shade and moisture will produce mold and mildew on any type of siding.
Step2
Preparation: This is the most important step to any paint job, whether you are a do it yourself or a professional. Tape off windows and shutters (unless you want to scrap paint off your windows)
Step3
Use a primer paint in the same color as the one that you choose. (A bonding prime is the best)
Using a paint sprayer is the best way to apply paint to vinyl siding. It will produce a smoother finish with out brush marks and will look as if it came from the factory in the color you chose. If you are not a experienced painter, I would not advise using a paint sprayer.
Home How-to Tips-How to Paint a Wall Mural

Part two to How to choose a Wall Mural. Now that you have decided to paint your mural and
chosen the theme, now you have to decide on whether you paint it or if you will hire a
pro. My suggestion is if you are handy with a pencil and can draw an outline, then you
can paint it yourself and the felling of accomplishment will be overwhelming. I am going
to show you how in three easy steps. Depending on where you are painting your mural will
determine the kind of paint you will want to use. Outdoor mural: Exterior paint in
eggshell.
Baths: Interior latex paint in semigloss or eggshell
Living, dining or bedroom: interior latex in eggshell.
Things You’ll Need:
* Over head projectoe
* transparency
* fine point marker (black)
* your print
* pencil
* paint
Step1
Trace you print using transparency film. Don't try to trace every detail just the major
outlines.
Step2
Protect your flooring with tarps and begin to pencil you transparency drawing on the wall
with the overhead projector.
Step3
Once you have penciled your mural on the intended wall, painting begins. Start at the top
and work your way down the wall to avoid dripping paint on areas you have already
painted.
Subscribe to:
Posts (Atom)